Search This Blog

Wednesday, February 25, 2015

Rusty Old Tools

It happens to us all who have tools, its a tool lovers nightmare keeping at bay that orange, red colour which eats away metal, in particular steel.

Keeping tools of any sort rust free can be sometimes seen as OCD, obsessive compulsive disorder. I am not that bad honest, having worked in the fields I have and environments where tools can go from one extreme weather condition to another their use and sadly abuse. This isn't just woodworking tools these are spanners, hammers, cold chisels metal working tools in general.

I would have liked to have been the sort of person who buys tools and treats them like surgical implements. I have worked with and know some people like this when they use their own tools. Sadly when it comes to others tools this being more often company or borrowed tools, this care goes out the window. I take the best care I can of what I have.

So what is RUST? Its defined as :-

rust
rʌst/
noun
noun: rust
1.
a reddish- or yellowish-brown flaking coating of iron oxide that is formed on iron or steel by oxidation, especially in the presence of moisture.
"paint protects your car from rust"
That last statement is just wishful thinking! it gets it in the end, more so if preparation of material and surface rust removal is not carried out with proper surface adhesion and coverage of paint.
History and science has proven that if Oxygen is depleted so is the decaying speed we know as rusting. Just look at all those ships and cargo sunk to the bottoms of oceans. Some having been down for well over 150 years with canons made of cast iron still solid as almost the day they were last fired.
No I am not suggesting we store our tools in buckets of water.
Then of course there are the tools we acquire which have seen better days, sad forlorn left to natures enemy to tools... RUST.
I had a few tools looking sad and in need of some TLC. On our trip to Toowoomba last year at the Toowoomba show I purchased a 1lt bottle of Rust converter concentrate  an environmental product so it says.
The fellow had some tools soaking and was able to show how it worked. Finally with weather as it is at the moment I bit the bullet and mixed it up 4 parts water to 1 part converter giving me enough to just cover the tools in a plastic tub.
With varying degree's  of surface rust down to the pitted type. They soaked from 20 mins for lightest to over night almost 24 hrs.
As each piece is removed it requires a wash with fresh water and then a wipe with a cloth to remove that and some of the residue remains of rust. From there its a case of light scrub to heavy working it over with WD40 as I went.
I used 120g paper, 180g a hard course scourer bought through ALDI which can be mounted on a grinder. A cheap kitchen type scourer and steel wool all depending on the level of work required.
Rust Solutions 1 lt concentrate organic rust converter is the product I used.
 Their safety instructions
  • Keep out of Reach of Children and Pets etc.
  • Store out of direct sunlight.
  • Avoid Prolonged Contact with Skin- Wash skin with Soap and Water after use.
  • Wear Safety Goggles - If you get the product in your eyes wash with copious amounts of water. If any adverse symptoms occur seek medical advice.
  • If swallowed drink plenty of water. If any adverse symptoms occur seek medical advice.
  • Use in a ventilated area.
  • Close lid tightly after use.
  • Make sure surface is clean of solution before welding.

 These are some of the tools requiring Rust removal prior soaking.


The Tin Snips above left and the saw below were the worst two items put into the fluid


 Below is the Rust Converter mix just after mixing and placing the tools inside.

I had also place in a Vernier height gauge which only had light surface rust but some bad pitting.


Below an additional saw added which had just slight surface rust.
Note the colour change of the fluid this is approx 20 mins after  mixing and placing the first items in.


Below:- the following morning almost 24 hours later a good soaking for the worst of the tools. There is notable flakes of rust on the bottom and the fluid colour has darkened significantly. I had also placed in the fluid a aluminium handled hacksaw.
 Below is one of the tenon saw and the scourers and steel wool used to clean up.
Belwo:-  Tenon saws both removed the previous night and cleaned to this level.
In the morning all the remained tools were removed and rinsed with fresh water wiped down, then each in turn was sprayed with WD40 during the cleaning process.
Below on the sheet metal snips rust scum was still lurking but much of this wiped off with a rag some work of a light rub required to remove the rest.I will remove the securing nut and clean up between the anvils sharpen and re-assemble as well as spray the handles.

 
Below:- Alan had purchased some number stamps at a tool sale over the weekend they had only light rust and grime they also got a soak over night which cleaned up the stamp area.

I had been sitting just outside the garage when it started to drizzle it soon turned into a down pour.


The converter doesn't harm alloy as can be seen here.
The hacksaw frame after clean up.

The Draw knife. 


The Gents saw, which I will latter respray the  top edge black.
One side has some serious pitting but light only on the other side. A little touch with a sharpening file will see it soon back at work.

Below the scum left after the 24hr soaking.


This was the worst of the saws a $5 buy, again the scum before cleaning  with WD40 and scourer.


 Finally the tin snips these have had a light rub with the scourer and spray with WD40 only. I need to remove the nut to clean up between the shears and then sharpen. I will also spray the handles afterwards with either black or blue paint..


I have placed a No4 no name brand plane in the liquid for a few hours and like the tools with wood handles all have been in the liquid. I was told when at Toowoomba  show by the rep/salesman that is how he had done most of his and he had no problem.
However I would not normally choose or recommend that this is done, as water and moisture does reside in the timber and at the surface of the metal. This will promote rust in any circumstances.


Would I recommend this  product YES at this point and for the removal it has achieved so far. The fluid is reusable as advised to what extent I have no idea, storage as per above in a plastic container NOT metal.

I will add photos and comments here of the plane and any notable changes of the tools done so far.

Ray


Saturday, February 14, 2015

Ornamental Turning A Passion or an Obsession?


Ornamental Turning A Passion or an Obsession?
Whats it all about?
How did I get into Ornamental Turning?
What drew me deeper into it?


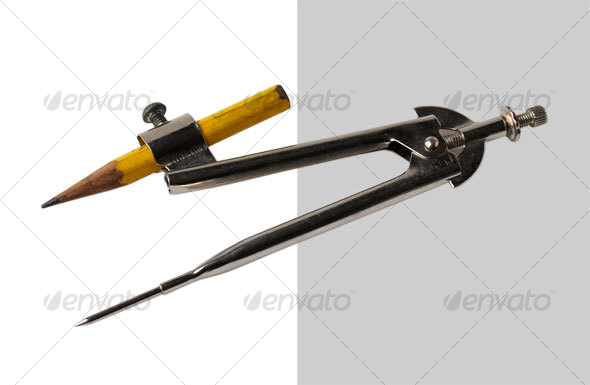
As kids our generation had what is was known as SprioGraph, but before we had that we had a compass, at Primary school we were taught to daw patterns on paper.


Compass - Industrial & Science Isolated Objects
I still have an old compass such as this


It was part of our mathematical class in geometry drawing Geometric designs. Even as a young fellow I saw these patterns and designs in things we had around the house and in some cases viewed or used daily. These were maybe not all in my home but relations or family and family friends homes, places we visited.

One common use was the every day watch dad had at one time, the face had some pattern work within. Internally many clocks had some form of pattern work also etched into the brass workings. I recall room door handles which had decoration cut into them be they wood, brass, cast or pressed metal. Some furniture and table adornments as well as Engine Turned things like dad's cigarette lighter or case, mothers hair brush set. 

Years latter in the mid to late 1960's a new wave of similar came into the art world known as String Art , I was doing art at high school and our teacher got me started. I even sold a few pieces through a local gallery as well as through and aunt.
It was good therapy for my hands and fingers having Charcot Marie Tooth of which I had just been diagnosed after seven years of investigation medically.
It was also a way to de-stress, I was eighteen months away from leaving school and heading into a working life. (that tale is over on my other blog).

 What's Ornamental Turning all about?

It has quite a history dating well back to days of Pole Lathes.
Its true staring point would be hard to define for sure, but even a person making markings in the dirt spinning around swinging a stick might just as well have been the first.
There are a number of Societies still producing such, Horologists, Society Of Ornamental Turners UK,
Ornamental Turners Group Of Australia, a USA based organisation as well as individuals around the world.
Wooden machines and tools along with Blacksmiths, clock makers all have some form or Ornamentation.

Scratches or cuts in the surface of a material is what is the main form of Ornamental Turning, some see it as a technical marvel others an art form to some its an obsession. I am yet to place myself in one of these categories.

I first saw Ornamental Turning at a Sydney Woodshow being produced by the OTGA gents of which I joined some time latter.

I tonight found this video and thats what this post is mainly for to link to a gent who is sharing his time with someone else to show him his Ornamental Rose Engine in action.

The video is some 30 minutes long and it doesn't get to the real action until approx three minuets in.
I have to say it was good to see that thy left in how easy a mistake can be made
by such an expert with such a fantastic set up of a Lathe as this is.


https://www.youtube.com/watch?v=zSE3Zww6fQE


Phew just located No35 Leinhard Rose Geometric Chuck this video is approx 34 minuets long.

https://www.youtube.com/watch?v=_onQqF61MuI


Monday, February 9, 2015

Pens & Pencils

Back here I mentioned about some worthless wood blanks as they have become known in pen turning circles.

Here are four of the blanks turned up into Workshop pencils.


I went on to use up my stock of Jnr Gent and Baroness stock of kits these were a few years old and the supplier of the Baroness has closed his doors it seems. The Jnr gent has since changed style of the facets now going to 12 instead of 6 and a few other variations depending on where the kits come from. This is rather annoying as to get replacement parts becomes almost impossible. Although Nibs and Roller ball refills are always available.

These first four are -
Red Acrylic and Chrome Baroness Fountain and Roller Ball pens.
24k Gold plated Jnr Gent Fountain and Roller Ball Pens.  


These next four are :-

Spalted Mango Jnr Gent Fountain and Roller Ball
Bull Oak laminated with a centre strip of Cedar again Jnr Gent.
The laminating was done by Alan Flett to see what it would turn up like. Its hard to distinguish in the photo a darker contrasting timber would suit this type of work better.


Showing the 6 Facet tip. 


 The next four s follows :-
Left to Right
Two Camphor Larurel Cross Cut Jnr Gents Fountain pen and Roller Ball
One New Guinea Rosweood Jnr Gent Fountain
One Baroness English Oak with Wenge showing it with a Fountain Pen tip.


 Camphor Laurel Cross Cut Pens.


English Oak and Wenge


New Guinea Rosewood


 This maybe the last pens for a while as these were last of some stock I had on hand. I have other interests and other plans to continue with.

Pen turning is as much frustrating as it is enjoyable, a slippery slope and it can lead anyone down a path be it winding or straight.
Experimenting with timbers, acrylics and a variety of other materials as well as finishes. Kits adds to the experience, if you do take the plunge take your time and above all enjoy.

Ray