This could be a long post good grief a month since posted last and its now 30th November almost Christmas the rush is on yet its also been and gone, this last month all sorts have happened.
I was on doing another project of the spinners and weaver type which I'll post when they are completed. In the midst of that a scream of shock horror from Sue indoors, so much so I almost got up and ran to see what the problem was.
The shelf in the storage cupboard had bowed so badly a 55lt tub slid out and almost crushed her. Drop everything while Sue unpacked half the cupboard a visit to Bunnings for material (Pine).

Make a few frames to support the very long shelf span 2.4m and two or was it three days latter done.
I was about to start back on the project ...when I got when notified of the an order from southern states.

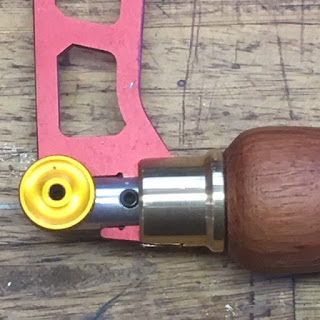
As per last post the Ferrules and Handles it had expanded to 3 x handles 10+1 yes yes that makes 11 x
Ferrules, 2x hiking Pole adapters and a mono pod camera mount the latter two for Alan himself.Supplies acquired and received it took about two weeks to get it all done.

Update :- 10th December.Alan's photos of the Hiking pole joiners fitted and how he turned the pole ends to suit.
Left is his photo of the parcel. Right this is one of the carved heads he had done in the UK for the top of the hiking pole.

The carved head when removed is replaced with an adaptor I made 1/4 x 20tpi for the camera mount and M8 for the pole end turning it into monopod.

Alan used his router set up to machine the required off the pole ends to fit the joiner, having cut the pole to bring it back to Australia from the UK.

The pole below in two parts for easy transporting and assembled.
The garden has produced stunning results in Roses and Zucini, lower blooms also if only the bugs would stop eating the leaves. Eric got the mower going so Sue could pull start it without a major 3/4hr argument between her and the mower.


All this is Sue's domain although I get some say.
This just one of about 12 since it was picked and they were up to double the size.


The Gardenia we have had in a pot for years has bloomed its best.
Installation of an ICB 1000ltr water tank acquired took both of us all done just in time to begin filling with much needed rain.
Photos to come.
 First Double Width Weave, 2/20 wool warp and weft, 4.5m long, 610mm in the reed, doubling to 1.2m in width.
An experimental weave to see how double width weaving works.


 These are heddels 500 of them Ray had orgainsed through a forum mate who is living in Canada to bring them back to Sydney then post them up to us a saving of almost $50 in postal charges, thanks Ian. The extra are required for my next double width weave using the full width of the loom.


