Search This Blog

Friday, November 30, 2012

Heart of My Heart

Back in 2009 I made a stash of pens one was a Purple Heart Sierra which Belinda received for her birthday.


More recently she asked for a Bolt Action in Purple Heart.


Belinda had asked if I could do a matched Pencil. The Sierra does come in a twist kit yet none of my usual suppliers had them listed on their sites anymore. In chatting with Ian Dorney who runs Hunter Valley Custom Pens he had one to spare. Ian posted two kits down for me many thanks Ian I owe you one, well a few really.

The Purple Heart was supplied by Pat Keefe some time ago, Thanks Pat.


Belinda's birthday is just a fortnight away so I said again she can have this for her birthday.
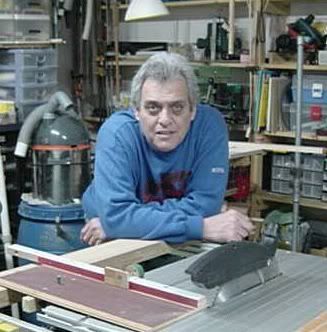
Friday's is her day off I had her come over and we spent the morning making the pencil.

Belinda cut the blank, drilled it trimmed the ends and rough turned it and began to shape the Purple Heart blank, but with almost 1inch nails she found holding the Skew steady and her back was giving her a lot of pain she passed the remainder over to me.


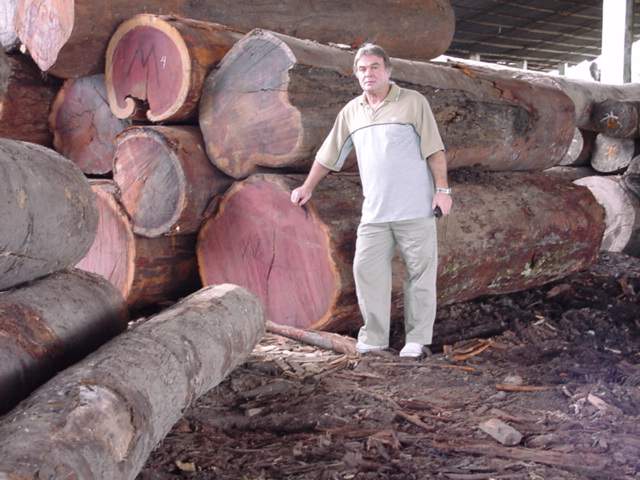
Purple Heart (Peltogyne pubescens.)

Description
The heartwood of this South American timber starts of as a deep purple when freshly cut. It matures to a dark brown with time.
Workability
Difficult to work because it is quite hard. Can burn on a wide belt sander if too much material is removed in one go.
Applications
Traditionally Purple Heart had a wide range of uses including bridge building. In Australia it is relative expensive and is pretty much used for furniture. We did see some decking a few years ago but that was a one off.
Availability
We keep limited stocks, all 25mm thick at present.
Hardness
100Kg/m3  Particularly hard.
Durability
Very Durable.
At a Glance

Turning: Excellent
Machining: Difficult
Bending:  
Sanding: Good
Nailing/Screwing: Excellent
Glueing: Good.
Timber Coating: Accepts most finishes very well
Oil: Fantastic with an oil finish.
Note 1 A highly sought after cabinet timber.
Note 2

Monday, November 26, 2012

Cutting Dowel To Length

So how does one cut a piece of dowel (wood or metal) to length?
With something sharp hopefully, held by hand, in a vice or V-blocks and marked to length.

What if you require multiple sizes and multiple pieces say 20+ of two various lengths or even two diameters and two different  lengths.

I have such a job to do at the moment cutting 48 x 10mm dia x 22mm Long plus 24 x 10mm dia x 32mm Long. A bit of a head scratch, a Jig would come in handy of course.

This was a quick jig inspired by  Niki Avrahami gentleman woodworker who passed away some time ago. He inspired me through the many simple jigs he made and posted on many Woodies forums around the world including the "U-beauts Woodworkfourm".

He did this FREE purely out of his love for woodwork and sharing his knack and knowledge from his humble garage/workshop. I miss them Niki and the emails.

Well onto the jig.

I took a block of scrap Radiata Pine and drilled to depth - two 10mmdia holes. 
One @23mm not including the taper angle of the drill bit.
one @33mm side by side with about 10/15mm between.
Clean out the holes of savings and check depth with a depth gauge, measurement is at the side not the centre, as this would be the depth of the point of the drill. The squared off ends of the dowel would not reach there.

I then drilled a relief hole right through approx 5mm dia. This also allows to use a fine object to push the dowels which have been cut out.

The jig is held in a vice ( and in my case also clamped to the mobile work trestle), insert the two dowel pieces and hold firmly to the bottom of the hole. I had Sue's assistance in doing that and cut to length flush off the face of the block. Use a smaller dowel or similar to push the cut dowel out.

I/we Sue and I cut 6 in a matter of minutes, we had to stop and pack up due to a thunderstorm which brought cooling rain, its no fun getting wet or sitting in a metal wheelchair when lightening is about.

Photos of the process tomorrow.

Here's the plan.
Photos of it in use


Sunday, November 25, 2012

Husbands Gift part 2 Completed.

Back in August I started this little surprise gift from Daniel to his wife Gabrielle. I have had to curtail any posting on the work as it was to be a total surprise and as Gabrielle is a follower of blogs and Facebook of sorts it became top secret.

  The 10" (255mm) and 14" (355mm) tenons formed using the Cole Jaws.Finding the hidden gems of colour in the Huon Pine gave way to an deepening love for natures gifts. Some woodworkers and customers see these as flaws and unattractive to me they can make a piece stand out from all the rest.


Huon Pine is like butter or cheese which has been put through a grater to turn, it has a scent which can not be explained.

 Next they are mounted in the chuck and the face edges and centre mound and hole drilled.
Daniel had butt joined three pieces together to form the 18" (460mm) platter to this I glued a block then mounted in the chuck and formed the mortise. Again some hidden gems of grain came to light, some fill was required. I used epoxy and coffee grounds mix. The two photos below are of the underside and mortise. I leave a large centre base area slightly raised so it gives a stable platform.


Then reverse mount in the chuck to face the top. The Nova's ability to swivel the headstock 90deg's as max swing is 16" over the bed and having the outrigger attachment is a bonus although a free standing tool rest can also be used.


Next the columns with a simple V twist, hand cut into them using a Microplane. Many thanks goes to John Robinson (Munruben off the Woodworkforum) for picking this size in particular up while he was in the UK a few years back. These and a few other sizes are no longer available.


The blocks 2x70x70x150 a Tenon formed to fit into flanges


 A base made for the 10" and 14" to sit on when used on their own to raise them off the surface. As well a few flanges are required for the columns.

In making one of the flanges I had a small disaster. I am glad as somehow I had missed this gem in choosing which ones to use.


A dry fit to check proportion, balance and appeal, still no hardware fitted as yet.


The finials. At last after much toying with ideas, these two pieces of Huon were very bland I decided on a Lewis Carrol story book theme and the Queens there in.
Laminating NSW Rosewood and the Huon to form a vertical and round pattern.

Having turned them round and drilled and fitted the 6mm threaded bolt I mounted them in the Gary Pye Collet Chuck, this is ideal as it doesn't damage the thread yet holds well and steady even without a tailstock and live centre assisting. Although a steady would come in handy (must get round to making one or two soon).


Photos of the vertical pattern after rough turning. Then below and right after shaping.


Left the round lamination pattern, beads formed where the Rosewood is to highlight.


A coat of Danish Oil and a dry fit.


These are photos taken after spraying with Timbalac. The bright sunlight just was to much to show the finish.


Left the 3 Tier stand.

Right as a 2 tier using the medium platter on the base and small platter.


 Left the large base and medium platter with a finial.

Right the large and medium platters with finials as single platters.
 The three platters above all these photos were taken indoors and show the Timberlac finish.


 Above the columns, finials and flange which show the threaded insert and mounting.

Sue and I wish Gabrielle a Happy Birthday and hope she finds many a use for her present from  a loving hubby.