Search This Blog

Saturday, November 23, 2013

Silver and Gold

I have none really!

I have to say a big thanks to David from Timberbits.
Early this year David graciously sent out to a number of his customers a couple of sample Bolt Action kits, I couldn't do them until now. 

I found a nice piece of cross cut Camphor for the Chrome pen. A bit of Mallee Burl which still had some cambian layer attached for the Gold. Finished with 6 coats of Nitrocellulose Lacquer.

These kits are from China not from PSI like the others I have done. The over all quality is different Gold plating is darker, in the bolt action mechanism itself its far from smooth it sounds gritty and the levers are different sizes and shape which can be seen if two are together.

  Recently David has brought into his line a Mark II kit also I have yet to see or make one of these.


Wednesday, November 20, 2013

Urban Legend


I had a special order to do three.........(customer changed mind), no best make that six PSI Bolt Action Gun Metal with Urban camouflage acrylic.

I am in the process of trying to complete another long over due project more on the in time.

These kits and acrylics were supplied by Pop's Shed in Melbourne as my normal supplier was out of stock and now has a back order from me. Pop's Shed had the new Black Op's kit in so I also got one of those.

One thing that can not be guaranteed is the colour match of the acrylics as can be seen below. The Black Op's acrylic is one from old stock of mine but so is one of the Gun Metal. All turned and sanded down to 1200 polished and buffed.

The background book is one I haven't read as yet The Judas Gate by Jack Higgins I have had it since last Christmas a present, I am on reading other books and material at the moment.


Added Tuesday 3rd Dec

Although I like the photo above of the Black Op's and Urban Camo it gets lost some how and blend in to well. Reflection of a bright yellow fluro shirts highlighting some areas. So another has been taken which I hope shows more of its character.


Monday, November 11, 2013

Bobbin Along

Prior injuring my shoulder (yes I am back stepping and back posting), it could have been while moving things about looking for wood, parts etc I did the injury.

I had cleared the bench created room and started once again on the spinning wheel restoration and the new build well parts the of. 

I prep'd enough material to make 9 Bobbins 3 for the restoration and the remainder for the new build. English Oak used for the ends and Cyprus Pine for the shafts.
The shafts are drilled larger than the shaft making enough clearance for it to run. The ends of the shafts I form a tenon and mortise the Oak ends drill them at the shaft size+ loose but not too loose. Glue the sections together and then turn to finished size this is best way to true them up (nothing worse then a rattly bobbin TV volume has to be turned up or it running out of true visually annoying) 

I formed the shape and the V required for the drive belt sanding and testing with a bit of fibre to make sure they are smooth and it doesn't catch.

Colour matching the original is still very much hit and miss but they are as close as I can get.

I did make the three Bobbins and colour them to a pre finished state must take a photo and post it also.


Sunday, November 10, 2013

Aldi - Work Zone Grinder Adjustment

About 12 months or more ago I purchased an Aldi branded Work Zone variable speed 4" grinder which will take a 5" grinder disc . However its sat idle on the shelf and in the box since then.


The arbor which should hold the cutting or, grinding disc in place and centred was to small and the tab washer large even for the Adli Diamond cutting disc's I bought at the same time.
I could not find disc's to suit either. The arbor backing washer was stepped approx .5mm I didn't measure that at all.
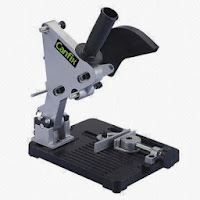

Grinder Cut Off Stand
Although I still have my 30 year+ Hitachi 4" grinder there was a need to upgrade, my old one didn't have variable speed nor did it have the grip handle or the holes to mount one, I need to use two spanners to remove and replace the disc. I could not fit it to the Aldi Work Zone Grinder cut off stand.

I had been going to ask Ken if he could alter the arbor lock washer for me but when I bought the Myford ML7 I knew I could do it myself. or at least have a go So today being wet and miserable I set about doing just that.


I mic'd everything up the disc's I have, all measured approx 16.18mm or .637" except the Diamond Cut off discs they were 20.03 mm or .7885".

The Arbor washer measured 22.20 mm or .875" a difference of 6.02 mm or .238" thats a tad over 15/64".

Below is the Arbor and both sides of the arbor back washer, the rebate is to lock the washer in place on the arbor nut flats.


Metric and Imperial dimensions of the washer


Measuring the internal of the disc


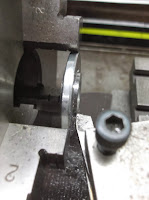
Thanks goes to Neil (Hughie) who used the lathe on Friday and sharpened the HSS cutter to a point to suit his needs, I was able to get a very nice clean  fine cut. When measuring 16.34mm the finished diameter and fitting the disc which sat snug.
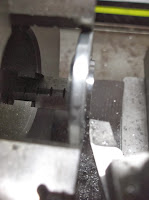
Set up on the lathe working this close to the jaws I don't mind saying I was uncomfortable with the clearance of the tool to chuck jaws. I checked averything at least six times turning the chuck by hand, moving the top slide and cross slide to make sure they would not hit each other.

Having seen pro fitters turners and engineers shave thou off washer this way I new it could be done either way

 The safest way to have done this would have been turn up an arbor to mount the washer onto giving enough clearance.

The finished item below.

I now need to make either a spacer to take the Diamond cutter discs or a hole new arbor back washer........hum my skills are evolving which way to go? The back of the washer has a rebate to fit onto the arbor matching the spanner flats so it doesn't spin.

All done and put away after testing all is now good.


Photos of the reasons I like and bought the grinder.
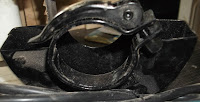
 
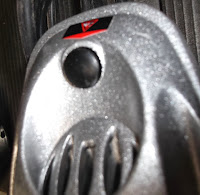
Quick release safety guard
Push button spindle lock
Additional handle and screw mounts
allowing attachment to the grinder stand

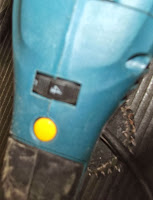
Safety lock on the forward of the switch
the switch mounted at the finger tips.
My old one has the switch mounted to the rear
of the grinder a toggle switch and is a real pain to get too.
Variable speed control mounted
on the top side


I still yet have to use it cutting or grinding.

Friday, November 8, 2013

Yellow Peril Lathe Steady

Its Big and Bright for a Bloke with a Heart just as Big. Pat Keefe whom I came to know via the Woodworkforums.com has over time done many things to help me out. Timber, tools he's found while shopping I might need, dropping by when he can thats a feat on its own Wollongong is down south but sometimes he passes through.

I had a great time making this lathe steady. Its is as can be seen a three arm steady at the moment with abilty to either be used as a four or five with the fitting of two more arms the holes have already been drilled if I had more 19mm rod I would have just made them myself.

Pat has a Woodfast M910 which has a 520mm (21") swing over the lathe bed. I made the opening approx 560mm.

Made out of almost everything I had here at home except M8 nuts for the locks for the arms and the bolts to suit, Pat can choose which type he wants there. 

The tube frame is 30mm x 30mm left over off an old table we have had for over 20 years. Blacksteel 19mm rod for the arms, off cuts of plate for the ways and an off cut bolt 3/4" which incidentally I got off Pat.  This part is major concern the measurements taken by Pat & myself are ok its when I calculated what was required I feel that its to short. I or Pat may have to remove 5mm from the top edge to allow better grip by the nut.

The in-line skate wheels left over from the pair I bought to make my own steady, the nuts and bolts 6mm  where from my old wheelchair.

O the paint I bought the paint also got to match "The yellow Peril" s Pat calls his lathe as close as I could.

I marked out on the rough side of a piece of ply, I used one piece each side cutting the angles on the metal bandsaw in the vertical mode and bending to suit. I have to thank Sue for the help in working out the angles normally I have no problem but a mental blockage for me didn't help.  The 45 deg angle at the ends and forming the four corners, 420mm long top and bottom rail.


Right all drilled and welded using my 35 year old CIG 110 amp welder.

 Below A little to big for the Nova.
 Right  The ways lock bolt and plate.


  The three support arms and wheels. I rebated the bolt heads or if Pat wants he can turn these around and have the nuts rebated.


Painted and final fitting. The shoe lace is thee temp till lock bolts are fitted.

 I was able ro borrow a gassless mig welder from another forum member Neil  to weld the lock nuts on, these I held in place with small magnets I had thanks to Mark my oldest son. Its been over 20 years since welding with a gas mig so there was Cocky droppings I had not seen since my days as an apprentice.