Search This Blog

Tuesday, February 7, 2017

Toowoomba Swap Meet February 5th

Toowoomba Swap Meet February 5th

While at Allora swap meet were found out about Toowoomba swap meet on the 5th February. A friend from Townsville rang a few days prior the show and lamb bastered me for not telling him about it. Seems he was coming down for work on the Monday after. He sourced flights etc and rang Friday to say he was down and shopping at Carbatc, Hare and Forbes and Gregorys Machine. He came over late afternoon bearing a cake. Great catching up with Richard.
We organised to meet up on Saturday which we did some time early afternoon at Toowoomba he had been there early gates opened at 6am. Sue and I running late arrived about 8ish.
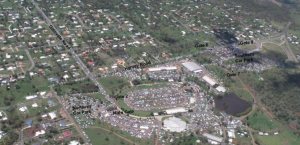
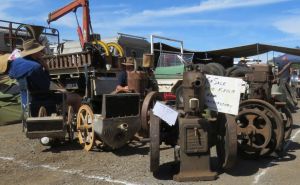
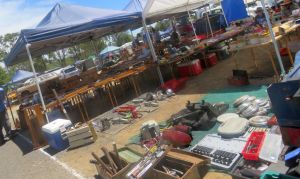
Acres of stalls so large we only got around 1/6th of the grounds, still we did dodge the auto sellers stalls.
An aerial view of the show ground.
stp1
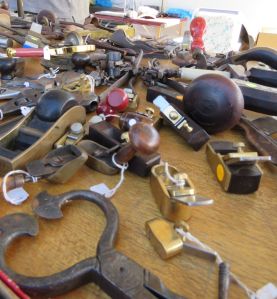
This is a car restorers dream, a hot rodders have for parts, a machine restorers scrounge barn. Oh and tool lovers heaven.
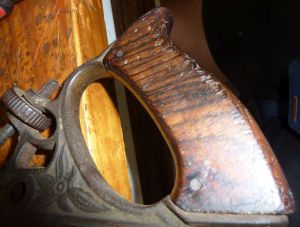
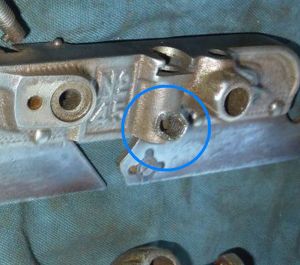
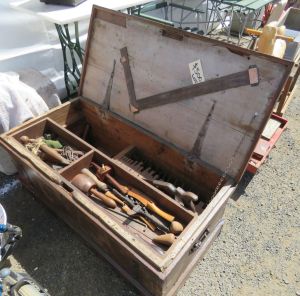
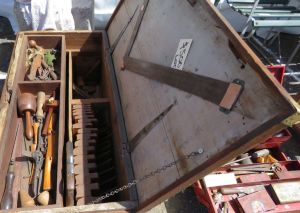
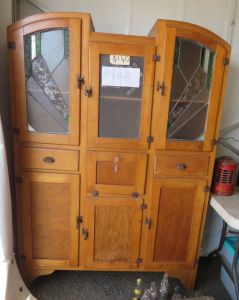
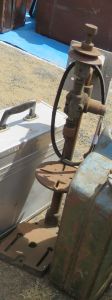
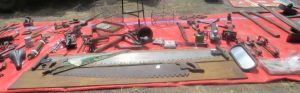
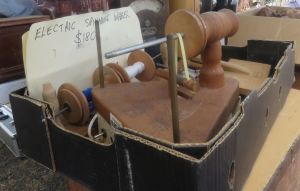
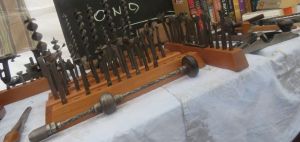
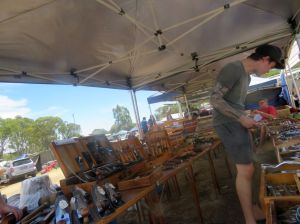
A few photos of what was on offer and video.
img_2647 img_2648 img_2649 img_2650 img_2652 img_2655 img_2656 img_2657 img_2659 img_2660 img_2662 img_2664 img_2665 img_2668img_2666
img_2671 
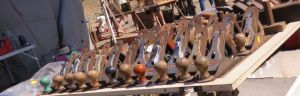
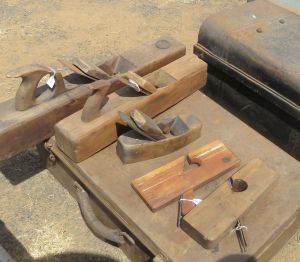
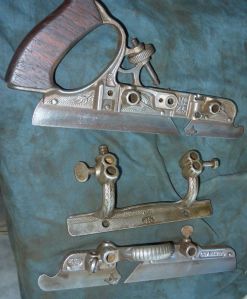
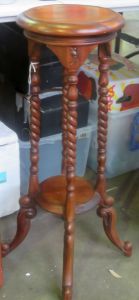
This plant stand almost came home with us. I see a future project.
img_2673 
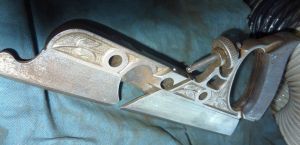
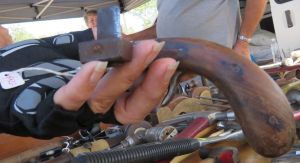
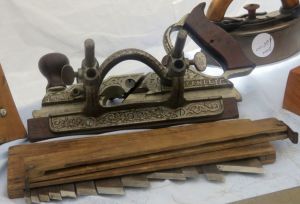
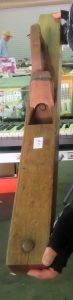
This plane is 1m long Sue is holding it.
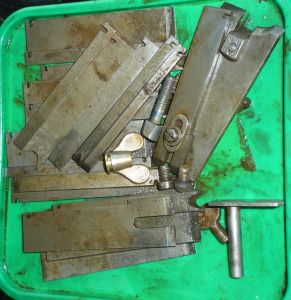
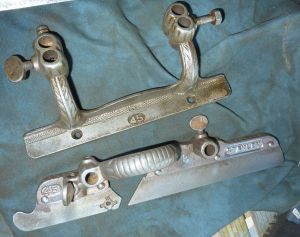
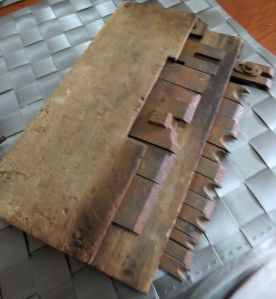
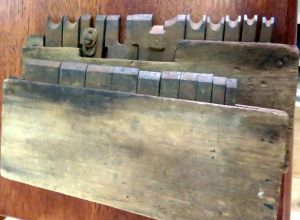
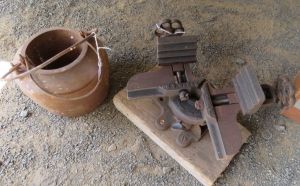
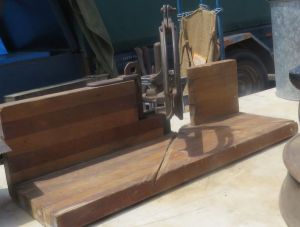
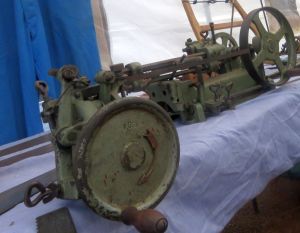
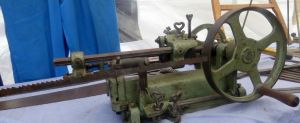
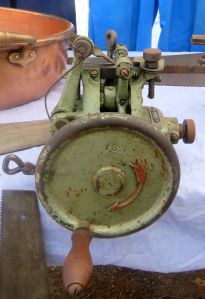
Below is a two part Bandsaw blade sharpener and kerf setting machine.
img_2674 img_2675 img_2676
A very short video of the above in action.


img_2678 
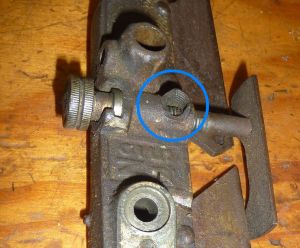
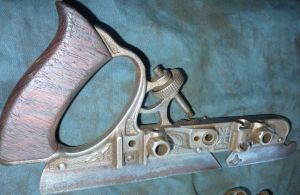
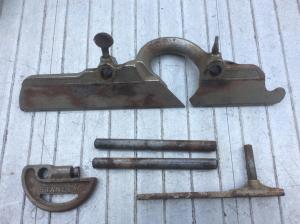
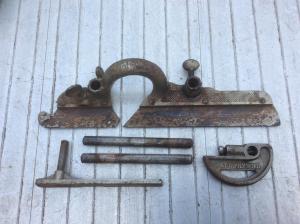
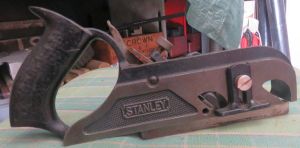
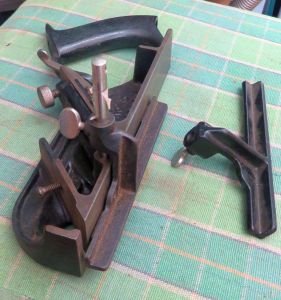
A rare Stanley chamfer plane.
img_2679 img_2680 img_2681 img_2682 img_2684 img_2686 img_2687 img_2689
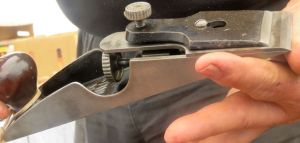
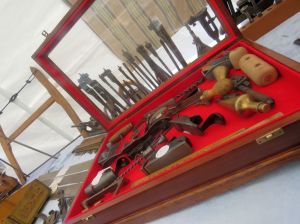
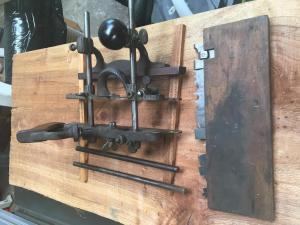
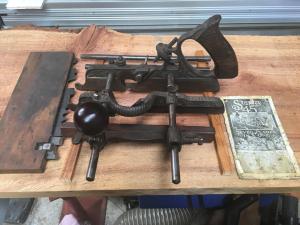
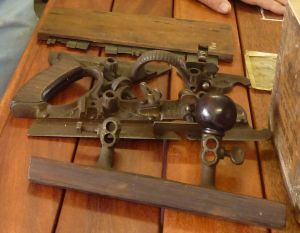
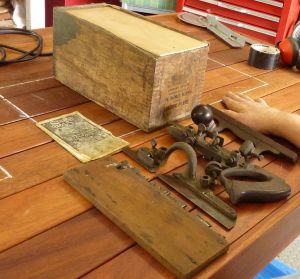
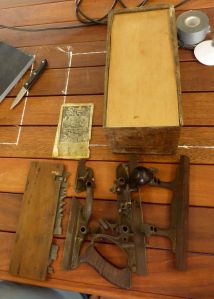
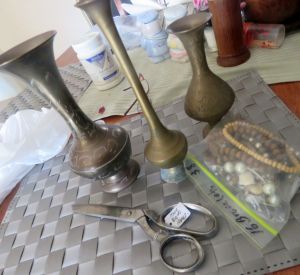
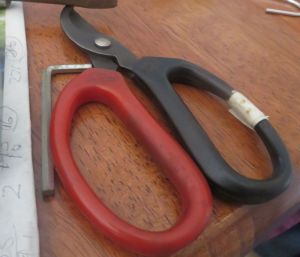
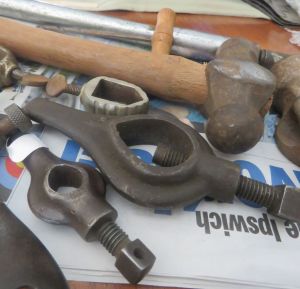
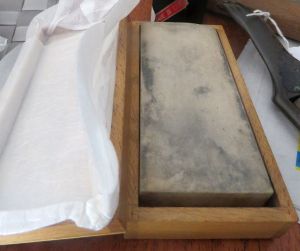
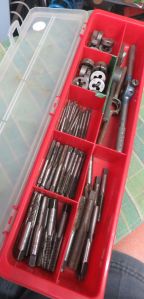
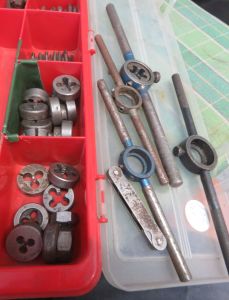
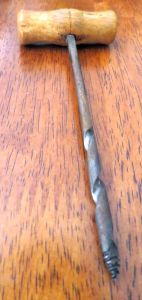
Below is what we did buy.
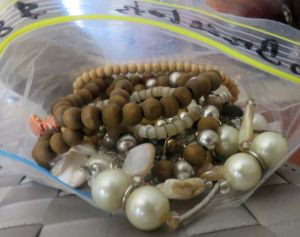
Sue bought the bracllet lot, Brass Vase and scissors.
img_2691 img_2693
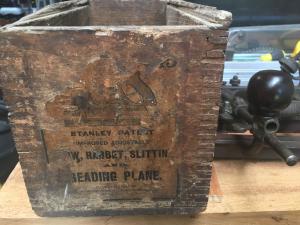
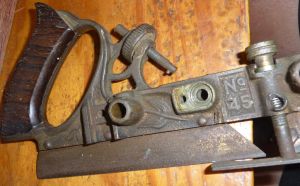
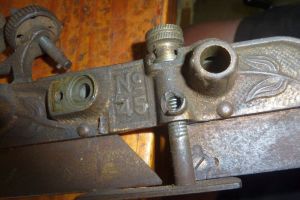
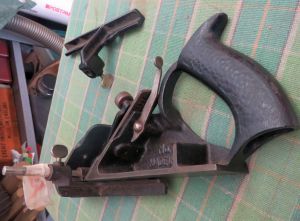
Me a pair of Bonsai pruning shears, Dogs for the Myford, Ball pein hammer and additional head. Arkansas wetstone. Stanley No 151 spoke shave, Stanley N078 Rebate plane.
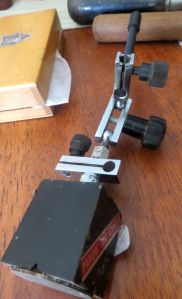
Dial Indicator mini magnetic stand. Yankee screw driver, Bradawl and a box of taps, dies and holders in it was the Japanese thread gauge.
img_2695 img_2696 img_2697 img_2699  img_2701  img_2700 img_2712 img_2715 img_2716 img_2717 img_2719 img_2720 img_2721 img_2702
Its well over 35 years since I went to a swap meet they have grown.

Stanley No45 Router Plane Restoration Part 1

Stanley No45 Router Plane Restoration Part 1

Through a forum member selling an old Stanley No45 plane I became its next owner thanks to Sue who gave it to me as a Christmas present.
The plane came as these photos below show in an original box although the lid is not original .
These were Steve’s photos he post on the forum.
img_2517 img_2518 img_2519 img_2520
My unpacking for inspection. Yes covered in grime, surface rust lid in place, original standard cutters and booklet.
p1100376 p1100377 p1100378
Noted: I noticed a few missing thumb screws, an additional hex bolt in place of another. No short bars and the emission of the latter addition of the Cam Rest a much sort after item. The cutters are in fine condition little surface rust and some still have an edge.
I didn’t photograph the total disassembly more a before and after soaking the metal parts in a vat of Vinegar over night or over a few days for stubborn dirt rust and grime.
p1100576  p1100575
During removal of all and sundry from the main body was when I found the broken casting area for the lock screw for the depth guide. This doesn’t render the plane unusable though.
I have spoken to someone will to Braze weld a repair so I can then re-machine and cut  a new thread.
p1100578damage
The Rosewood Knob and handle both in good condition. I like the Tiger grain very much this was taken after a clean up and light sand.
p1100579
All the small bits, screws cutters etc soaked in white Vinegar  dipped in clean water to rinse then sprayed with WD40.  Scrubbed using a BBQ stainless steel scrubbing brush.
The Fence and out rigger skate both fitted into the vat. I was reluctant to soak the main body with the handle still attached. I brushed on Vinegar and used battery drill with a brass wire brush attached to clean it up. Again sprayed with WD40.
p1100581 p1100582b
p1100583 p1100583damage p1100584 p1100585
Two packs of additional cutters were bought at Allora Swap Meet, these have also been cleaned up of surface rust. Some are double up of what I already have, further cleaning required.
img_2637 img_2646
Just this morning on the woodworkforum a reply to my post on the restoration/call for help. Henry whom I know from Sydney scored some parts at Bathurst swap meet, I have bought these off him at cost plus postage.
They are in the mail thanks Henry.
Among the parts are two short rods which I didn’t have, the larger depth stop a spare skate with three thumb screws. Best of all the much wanted, sort after, prized, treasured Cam Rest.
image image2
Well that is where I shall leave this for now. It has been packed away until I see the fellow about the weld repair. Also other projects can continue and we have a visitor arriving for a short stay.

Scheppach bts900 Disc and Belt Sander Overhaul

Scheppach bts900 Disc and Belt Sander Overhaul

I’ve had my Scheppach bts 900 sander for some years I’ve replaced the toothed drive belt once in that time.
Just prior Christmas while using it I noticed the belt sander when being used was stalling and juttering. On closer inspection my hunch was proved right the belt needed to be replaced yet again.  It had de-laminated as photos show.
A very simple easy fix!!?? just require a replacement belt right?  WRONG!!!
Hare & Forbes like many other places through Christmas and New Year were closed. I don’t blame them we all need family time. Finally ordered the belt……and a few other things so postage wasn’t more expensive than the part.
p1100468 p1100469
Generally the procedure to replace the belt is release the tension on the nut and screw under the belt sander, slip off the old and slide on the new. Re-tension via the screw and lock nut.
p1100548
When I released the tension and started to remove the belt the top pulley moved quite a bit. I knew that should not have happened. The photo below shows how far the shaft is of centre.
p1100471n
Word of warning ! The screws on both pulleys are LEFT HAND THREAD.
p1100468lth
I’ve have tried to cover as best I could with photos and words the strip down.
Remove the linishing belt.
Undo the lowe plate screws and remove the safety guard.
p1100550
To remove the plastic cover there is one screw inside the  leaver area and two screws hidden under the feed direction tag one at either end of it. You’ll be lucky to replace this tag.  I suggest warming it with a heat gun or hair dryer to soften the glue. Place it somewhere safe from dust and dirt, in hope it will re-attach. I cut mine down so the screw holes are no visible in the future.
p1100551
Remove the two large hex bolts retaining the linisher table these are the ones in the slotted area.
Tap out the bearing housing from the casting towards the table side.
I should have known better than the pulley screw was frozen and could not remove the screw using an impact driver.
I had tried the three retaining screws for the bearing housing also in behind the pulley. Two were stubborn but finally came free only using the impact driver. The last one had to have the head drilled off and latter vice grips used to remove it.
p1100532
The two large cap screws which secure the table for the sander also lock the table into position of any angle. These are the only two screws required to undo and remove the belt sander table.
In removing the table I began to drill the head off the pulley counter sunk screw the action of the drill grabbing in the Phillips slots loosened the screw, sadly not before damaging the slots.
The three bearing housing screws only secure the housing to the table bracket. I had undone these after removal of the pulley. The bearing housing needed a slight tap to remove it from the casting.
Once I had begun to remove the table or during lifting it up I noticed three things.
The bearing was off the shaft shoulder where it should have been retianed with a C-clip and fell out of the housing.
2 There was no sign of a C-Clip which was supposed to be retaining the bearing on the shoulder of the shaft. Not even metal remains of said clip.
3 Then latter the shock when assembling it all, finding the table arm was bent where it was all mounted to.
Obviously it had been dropped or damaged during our move so I thought. It was bent opposite to what would be expected. I am usually the only one using it, f it had fallen off the stand prior the move it was my fault (nope). Maybe a visitor knocked it off or picked it up by the table area and it bent.  I’ve jumped ahead here.
Back to task at hand.
p1100478n  p1100477
I had used the sander quite a bit since unpacking but looking at the damage done from it sitting off kilter to the inside of the arm, shows it must have been damaged long before our move. I thought that with the bearing having moved on the shaft with no C-clip to retain it was what caused the damage. it was not that alone I latter found.
Photo Left showing the position of the bearing which should at least have been a push fit.
Right and below left the scoring damage done to the inside of the fork.
p1100480  p1100494
p1100497
To remove the Main shaft from the roller there are two grub screws centrally located on the roller one below the other in the same hole.
p1100508n  p1100509
Both bearings replaced and new belt arrived, picked up a box of C-clips from Hare and Forbes when picking up bearing from the bearing supplies just around the corner.
p1100518   p1100517
Sifted through my supply of hex cap screws and Phillips machine screws for replacements for the bearing cap.  I went with Hex cap.
p1100514
Then began the reassembly.
p1100525n  p1100527np1100526  p1100528 p1100529n
That is when I noticed the bent fork arm when I mounted the roller. Obvious now why the inside of the fork had so much damage along with the missing C-clip and bearing movement.
I clamped the frame to the bench and a few well placed hits with the hammer brought it back into line. Care must be taken not to over work or alter the tongue in an adverse direction.
p1100534n
p1100537  p1100538
p1100540 That looks close enough.
Below is the other end bearing assembly process, its location to the C-clip’s sorry no photo of the bearing cap.
p1100541 p1100544 p1100531
Below is the underside view of the table mounted. Note the lock nut and adjusting screw for belt tension. Remember to re-tension the belt.
p1100548
p1100547
Check alignment of the pulleys making sure the top pulley is in correct orientation and fit the belt.
p1100555
This is all re-assembled using the damaged LEFT HAND THREAD screw for now an order has been placed with Hare & Forbes for a $5.50 screw from Germany still yet to arrive. There is nowhere that I could locate one M5 x .8 x 19mm left hand thread counter sunk machine screw through known sources. Thanks goes to ken for making me triple check thread pitch.
Yes I could machine one up or locate a left hand die to suit it is all about the cost over all.
Reassemble the linisher table. I fitted a new 100 grit belt and a 120 grit sanding disc.
p1100557  p1100552
I await the left hand machine screw.